Proposal
For class on 9/3/2014, I had three ideas for the PLAY project.
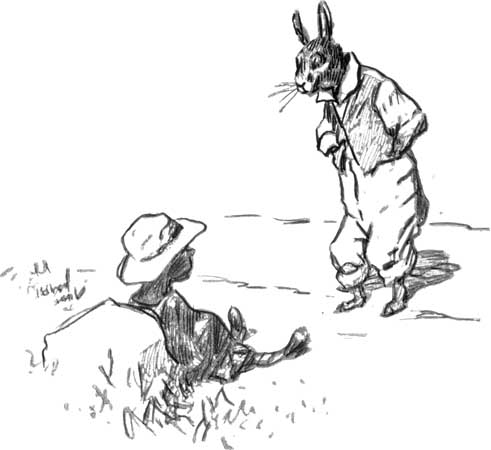 |
| Brer Rabbit and the Tar Baby (Drawing by E.W. Kemble) |
- Brer Rabbit and the Tar Baby
- Original story is stark, not very pleasant
- Fox creates tar baby, leaves on road, Brer Rabbit gets stuck in it while interacting with it
- So Instead!!! Depict Rabbit and Tar Baby playing with an object while the fox watches
- Relieve the tension of entrapment -> Freedom -> Play
- Medium: Sticks, twigs, mud or tar, clay, paint
- Scale: Miniature (characters scaled to 4")
- Bicycle Ferris Wheel
- Convert a scrapped/found bike into a ferris wheel/carnival
- Medium: Bicycle (metalwork, rubber)
- Scale: Medium (3-4 feet tall)
- Pepakura From Trash
- Using trash found on campus, create a baby crib hanging toy with creatures made using glue and scissors and string.
- Scale: Medium
The feedback during class wasn't all that hot, and Mrs. Rothrock clarified a little more about the project, so I decided to scrap all three ideas.
Final Project - Process
I had no idea, really, what to do. I didn't want to dig through trash or random crap to create something I wasn't interested in. Then I realized something...after all the DIY projects, cosplay, and arts and crafts that I've done over the past 18 years, I had a ton of supplies laying around that I could "find" and go with the flow.
After taking note of what I had (I'm somewhat proud of my collection of random awesome craftsy stuff), I decided to try making the Brer Rabbit and Tar Baby idea, except by making two bendable flexible dolls with velcro on them so that they could toss a fuzzy ball to each other and it'll stick. I also intended to have a large fox sleeping on a backdrop, wrapped semi-circular around the scene. This way, the observer could come up to the art and play with the dolls, pose them, or do whatever.
I began creating the dolls immediately. I didn't need to do any research--at this point I was running a bit behind and so I decided to wing it. However I had a clear idea in my head of the art I was going to make, and I guess the years of crafts made it easy for me to immediately think up the process and materials I needed to use, even though I never made a bendable doll before in my life!
Materials for the Idea
This is the list of materials I knew I'd need for the project. Green is something I already had in supply, red was something I had to buy, and blue was something I scavenged.
- Armature Wire
- Cotton or Workable Foam
- Buckwheat Shells
- Electric tape
- String/Thread
- Magnets or Velcro
- Fabric and Leather
 |
| Tar Baby and Brer Rabbit Basic Armatures |
I began creating the armatures for the two dolls. I needed wire so that the user could bend the limbs and body and it'll remain in that position. I tried coat hanger wire at first, but I needed something much more malleable so I used some of my aluminum and alloy armature wire.
 |
| Padding |
Next I began the padding. I found a foam pad in a couch cushion by the apartment dumpster, washed it, and used it as the material to give the armatures form. For the most part, all I had to do was run the wire through the foam pieces I cut out of it. I gave full form to the rabbit, since I wanted him to be light-weight and floppish. For the tar baby, I gave smaller chunks separated by electric tape--my intent with him was to use Buckwheat shells from some pillows to fill the limbs and body, thus making him heavier and a different experience than the rabbit.
It was when I got halfway through the fabric outer layer of the rabbit that I realized that I wasn't going to have time to finish the piece. It was already running me 5 hours just for sewing on half the fabric, even though I switched to the easiest most basic method of outside-stitching along the contours. It's partially my fault since I chose a thick string, which meant a thick needle, which meant it took a long time to push it through the fabric, among other things.
By the time I got to the ears, a new idea arrived in my cranium, one which better served the PLAY theme, and overall was kinda cool to do. I could also finish it in 3 hours instead of the decades long toil that I would otherwise succumb to.
 |
| Mah Man! |
Somehow the idea came to me to put a silly version of my face on the rabbit (using iron-on print transfer paper), rip off the unfinished ears, and give "me" to the audience to play with and gauge their reaction. So I snapped a picture and then photoshopped it a little, printed off a test copy and matched it up against the doll's head.
 |
| A Third Eye |
Then *GASP*, it struck me, why not make a ton of my faces so that the audience can just play around with a wide range of "me". So I kept the weird tri-cyclops one, took a bunch of other shots, kept 10 total, desaturated, adjusted levels, and cropped them, and printed them all out on cardpaper, cut them out, laminated them, and then cut them out again. Then I stuck Velcro on the backs of each. Genius!
Anyway, I added some accessories as well. I ran out of soft Velcro backing to add to the chest and feet, but they still stick to the doll somewhat since it's a felt/plush(?) like material. Added a sign and presto! Finished project.
 |
| Final Project and Presentation Layout |
I am much happier with this result than I was with my previous ideas, and this is so far beyond my original intentions that I'm actually somewhat proud of it, simple though it might be.
